In the earlier post i have configured the opencv2.1 with dev-c++ now opencv2.2 is there and it has many more library including all the library in previous vrsion opencv2.1. So it will be good to use OpenCV2.2.
For configuring the opencv2.2 with dev-c++, first you have to install opencv2.2.
You can download OpenCV2.2 from here.
After downloading install OpenCV2.2
and do some changes in the Dev-C++ compiler.
go to Tools->Compiler options then follow these steps as shown in image below.
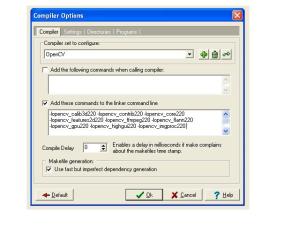
In this image all the linker text is not visible so just copy this:
-lopencv_calib3d220 -lopencv_contrib220 -lopencv_core220 -lopencv_features2d220 -lopencv_ffmpeg220 -lopencv_flann220 -lopencv_gpu220 -lopencv_highgui220 -lopencv_imgproc220 -lopencv_legacy220 -lopencv_ml220 -lopencv_objdetect220 -lopencv_ts220 -lopencv_video220
and click ok.
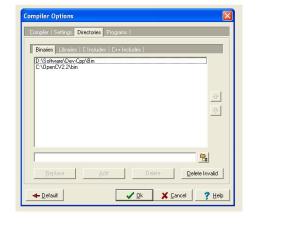
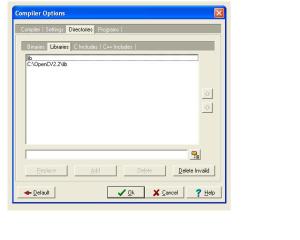
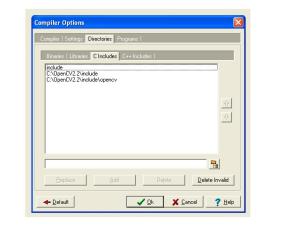
Now goto directories and add some directories of OpenCV2.2.
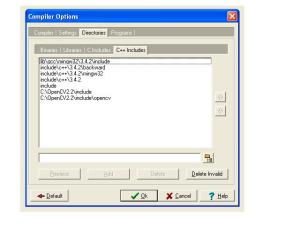
For configuring the opencv2.2 with dev-c++, first you have to install opencv2.2.
You can download OpenCV2.2 from here.
After downloading install OpenCV2.2
and do some changes in the Dev-C++ compiler.
go to Tools->Compiler options then follow these steps as shown in image below.

In this image all the linker text is not visible so just copy this:
-lopencv_calib3d220 -lopencv_contrib220 -lopencv_core220 -lopencv_features2d220 -lopencv_ffmpeg220 -lopencv_flann220 -lopencv_gpu220 -lopencv_highgui220 -lopencv_imgproc220 -lopencv_legacy220 -lopencv_ml220 -lopencv_objdetect220 -lopencv_ts220 -lopencv_video220
and click ok.
Now goto directories and add some directories of OpenCV2.2.


A simple example for capture an image from camera
#include#include #include #include int main(int argc,char *argv[]) { IplImage *frame=0,*grayimg=0; CvCapture* video=0; video = cvCreateCameraCapture(1); if(!video) { printf("\nCamera Initialization Failed............."); } cvNamedWindow("Display",CV_WINDOW_AUTOSIZE); while(1) { frame=cvQueryFrame(video); if(!frame) break; cvSaveImage("image.jpg",frame); cvShowImage("Display",frame); char ch=cvWaitKey(30); if(ch==27) break; cvReleaseImage(&frame); } cvReleaseCapture(&video); cvDestroyWindow("Display"); getch(); return 0; }